My quest to find my inner crafty-girl one small project at a time.

Monday, February 28, 2011

Frame Take Two

So, remember my story from last week where I tried to spray paint in the wind? You can read about that here. (I act like my blog is soooo extensive it will be really hard for you to find that post or remember SO far back as last Friday!)

I went back out on Saturday - it was lovely out. And no wind! I had used all of the spray paint in the painting gone wrong adventure, but I was painting the trim in the bathroom (will tell you more about that later this week) and had out the Ultra White semi gloss paint from Behr. I just repainted over what I started. It looks nice, I think.

And here it is back in the bathroom.

I am still not convinced that this frame from the living room should be painted white though. Hmmmm....


Friday, February 25, 2011

Lesson Learned


Aaahh...major mistake today. The forecast had called for torrential rain in the DC area today. It rained early this morning and then by late morning, it was awesome. I took advantage of the sunshine to take a frame outside to spray paint.

I had another frame like this one from the other day...
At the same time I made that for the living room, I made a similar one for our upstairs bathroom. The color on the walls is Soothing Celadon by Behr but we had it color matched to Benjamin Moore. I need to add another coat to the walls in there before I reveal it. So, I digress, the point is that the color on the walls is very similar to that light blue that is in the fabric. Actually, the real point is that I had framed a 8x10 rectangle in a very similar frame to the one that is above. (With all the sun shine today, I forgot to snap a before picture.)

After my post on those frames the other day, I got some good feedback to spray paint those frames white. I was unsure about that in the living room because all of the other frames in there are black. (Feel free to leave your opinion on that!) But, the tile in the bathroom is white with some black and the shower curtain is white, sooooo....I thought a white frame in there would be perfect!

And, here is the lesson learned. Remember the rain I mentioned? Well, it wasn't raining once I put the girls down to nap - it was quite beautiful and I seized the opportunity to get my craft on. But, apparently it was VERY windy. I thought it was no big deal. Uh, rookie mistake! As soon as I started spraying, the newspaper I was using as a blotter started flailing and curling up all over the frame. I would spray, and it would curl from the wind. I managed to get one coat on the frame but it is horribly blotchy from newspaper markings . So, I cleaned up and left it outside to dry. I will surely be at the hardware store to get some more paint later today. I don't want to show a pic now, but will once I fix the mistakes!

And, now I think it is raining. S-a-weet.


Thursday, February 24, 2011

Dining Room


My dining room is the first room we really tackled in this house. I had a vision after seeing this amazing dresser from Cassie.

LOVE! I loved the gray in it as well as the style. I contacted her right away and told her I need something like that ASAP. (Well, as soon as I re-do the room and save some moo-lah for my new custom side board but that doesn't roll off the tongue like ASAP does)

So, I hatched a plan to redo my dining room in those shades. Keep in mind that the room opens into the kitchen and into the living room. It started off beige/yellow on top and red below the chair rail. There was nothing wrong with it, but just not my style. Here are some before shots of the room.


My dad is super handy so I begged him to come for a few days to help us paint (and by help I mean do) as well as add some crown molding and wainscoting. Using that awesome dresser as inspiration, we went with gray on top of the chair rail and white below.

And, here it is with the paint on the walls. The color is Sweatshirt Gray by Benjamin Moore. (My dad raves about B Moore, and says it really goes on the best of all the paints. I listen to dad so went with that. After reading about so many other great option out there, I think I will try something a little cheaper down the line.)


With the crown molding and the start of the wainscoting.


Here are some final pictures of the walls and the new chandelier.


We are still in progress. I hope to get a dark wood table and chairs in the next few weeks. Of course it still needs art on the walls (remember that mirror?) and some curtains. I think the mirror will go on the wall to the right of this little bar. I will be sure to post some more in progress pictures in the coming weeks. I am thinking long white breezy panels (uber cheap from Ikea.) Maybe add a cool fabric border to the top of the curtains, kinda like these awesome curtains from Little Miss Penny Wenny.


I love, love, love our room now. The hard part is looking into the living room and knowing that I am desperate to get that room done too. I need to decide on a color for the walls in there to complement. More on that later. Yay for fun makeovers!

Wednesday, February 23, 2011

I am slightly addicted to


...mirrors, apparently. I already showed you this one that I made a few months ago. I bought one from Target the other week to spray paint white and hang in the dining room.


I love, love the shape of it, butI wasn't sold on the size of it for the scale of the wall, so I bought another one at Goodwill this past weekend.


Also, with plans to spray paint it white. I am thinking I can keep them both and hang each somewhere in the house - with one definitely going in the dining room. This afternoon, while it was still sunny, I decided to take this one outside and get started.

It was only $8 (originally marked $80 from somewhere!) so I figured it was an ok place to try my hand at spray painting. Melissa gave me some Krylon semi-gloss spray paint, although we both agreed that gloss would be better, but I went for it anyway! Here it is after one coat.


I must admit, I was a little nervous about the coverage after this coat. The mirror has a lot of cool details and divets and I was unsure how the whole spray thing would go. So, I kept spraying, and spraying and spraying!


Here is an up close shot of the details. Kinda cool, huh?


And, here is a final shot.

My husband and I both agree that it needs a little roughing up. Before I even said what I was thinking, he said he thinks it would look cool distressed a little. I am going to put my new sander to good use and then get some gray stain to rub over it. As, I said, the mirror was 8 bucks, so it's good piece to start experimenting with, right? RIGHT?

So, that's one of the mirrors done. Well, almost done. I will let you know what happens when it is REALLY finished. Still one to go. (That one from the top of the page.) That one will definitely be glossy. And I want to make another one - this time a large floor mirror for my bedroom. You know, like the kind that leans on the floor with a really awesome, chunky frame? I plan to make the cool frame... Kinda like this one from West Elm. Stay tuned for that when I get the cajones up to actually try it.

Chunky Wood Floor Mirror


Tuesday, February 22, 2011

Thank you and some art work


First off, I need to say a huge thank you to all of you who have hopped over from Primitive and Proper and have left such nice comments. It's so nice to have encouragement with this new endeavor. Cassie and Melissa at HOUSEography (my only two real-life blogger friends) kept saying how nice people are out there in the blogosphere. And, it's true :) Thank you!!!!

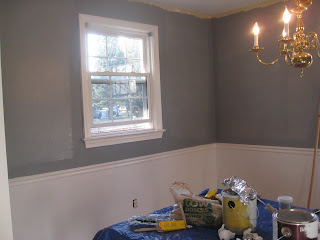
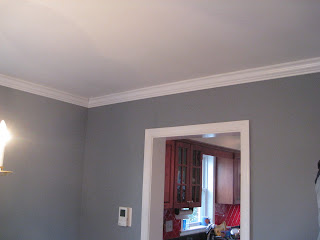
So, my real post is about some home made art work that my mom and I put together. A friend of mine who used to work at Crate and Barrel gave me the idea to frame some fabric, apparently they do that at Crate all the time. So, right around the holidays when my parents came to visit so my dad and my husband could re-do our dining room (I will be posting about that transformation soon, it's A-MA-ZING!) my mom and I decided to tackle a few little projects of our own. The living room opens into the dining room and I wanted to make something with some complimentary colors. The dining room is gray, sweatshirt gray to be exact. (Funny, right?) Anyway, right now our living room is yellow-ish beige, with red couches. Remember, I didn't choose the colors. Well, I did choose the couches, but that was a LONG time ago! I digress, we WILL be painting that room soon, but for now, we needed something that would pull in the gray, the red and the yellow.

Our first stop was Calico Corners, how awesome are these? Unfortunately, they don't just let you cut a yard or two of fabric, you have to order everything (even just a yard) and they send it to you. So, while I really wanted some of those fabrics, I have no patience and wanted it that day. (I also wanted to spend a little less money.) So, after a few more stops we got some great fabric at Joann's. We picked up some batting while we there to make the frames puff a little.
I had bought some thin, black frames at Ikea early that week and we already had the duct tape. I think all told, we spent $20 for the whole project. (I even had some fabric left over to create a little something for the bathroom)

We measured the batting and fabric around the little cardboard insert that comes with the frames. Then, we started pulling and taping. That's right, we used duct tape! I told you we were budget. There wasn't anything for us to staple gun onto, so we just pulled and taped, pulled and taped. We decided not to use the glass on the frame for added puffiness.

Here are the pics:

Here is the back...aka the tape mess:


And another shot of them:


I love the look of it, although something seems like it's missing a little. Maybe a thicker frame? What do you think?

Monday, February 21, 2011

Curtains on the cheap


Remember when I mentioned that when we moved in, we loved everything about the house? Well, I think I said that everything was "fine." Let me clarify...when we first looked at the house, we thought it was the kind of house we would LOVE to live in, but never would. We really did love everything about it! That's why we were so content to leave it the way it was for 6 months. I had been thinking about how we could personalize it and make it more of ours for a while, but didn't really start until around the holidays.

One way that I tried to customize our last house was by dishtowel curtains in the kitchen. Yes, you read that right, dishtowel curtains. I found them at Target and they were just the right color blue. I thought it was a little weird, but then I put them up and you couldn't tell they were dishtowels. So, after that, I thought I was genius! (Did you get the sarcasm?) How could you not love $10 custom curtains??

I love Target and am there quite often, so every time I am there, I peruse the dishtowel area looking for something that might work in this kitchen. Our current kitchen is beautiful. I love it. Black and white tile floor, cherry cabinets, black soapstone counters, stainless steel appliances and a red backsplash. Yes, a bright, red backsplash. Don't get me wrong, I love red...but a red backsplash is a bit much. We would love to change it down the line (apparently my dad is a rock star and can change this out for us.) We would love a white subway tile like this one from Home Depot.

Anyway, in the meantime, I needed to find a way to spruce up the kitchen and add a little pizzazz until the tile redo. I figured curtains would be an easy update. Here are some before pictures of the windows. (Excuse the dark photos.)


Looks a little bare, right? That's what I was thinking. One day sometime before the holidays, I saw some red, black and white dishtowels. They were the perfect colors and would add just the right pop of color. I bought 4 of them at $2.99 each! Right?? How great. I got the cafe curtain rods and the ring clips at Lowe's for about $5 each. All I did was fold 2 of them (for the window above the sink) and clip them onto the rod. And, here we are voila...so easy!! Target strikes again with custom curtains for under 20 bucks!!


Saturday, February 19, 2011

Giving Credit Where Credit is Due

My dear, old (by old, I mean we have known each other for 20+ years, not that she is old!) friend Cassie from Primitive and Proper has been my design guru of late. (We have been friends since middle school!) She is so creative with her furniture and crafts. When we moved in and after I decided to redo the dining room in a dark gray, I started asking her some questions and picking her brain. We were mainly talking about the dining room but I mentioned the mantel as well. She gave me a fantastic idea to create a sunburst mirror above my mantel. What's funny is that I had wanted a sunburst mirror forever. I had always liked this amazing one from Crate and Barrel, but couldn't stomach the $200 price tag. So, when Cassie mentioned it, she gave me the idea to actually make it on my own. Whaaaaattt? (I think that was my exact reaction to her!) She sent me a few images and how-tos from other blogs.

I contemplated it for a while and then...I did it. I made it!! I used this one from Dwellings by Devore as my inspiration. I didn't take any before and after pictures because when I made it back in October, I had no visions of writing a blog! But, here is the after!
(Please excuse the Christmas decorations)


So, while I can't show you step by step, I can at least tell you what I did to make it. Once I had the idea, I started scouring Target and Home Goods for a small round mirror that I could transform. I finally found one from Home Goods for $7. It was dark wood and had lots of little concentric circles around it, kind of like this one. Once I had the mirror, I went to the local grocery store and got two packages of bamboo skewers for just $1 each. I already had the glue gun and glue sticks.

Once I had my supplies, I got to working one night in the basement while we were watching HGTV. As I started gluing the skewers around the edge, it became quickly apparent that I had no idea what I was doing! It took several tries for me to get it right - at first I was putting the skewers RIGHT next to each other without any space so as it was going around, there were odd angles. My dear husband helped me to realize that there should be some space between the skewers. So, I de-glued and tried again. The next night I had to get another package of skewers (there are about 250 suckers on there!) Lastly, my brother spray painted it for me and voila, here we are. An awesome start burst mirror for about $15. A whole lot less money than those awesome Crate and Barrel ones!

I think that was the official start of my bug. Once I realized I could make that and it came out pretty decent, I realized that there was a lot more I could do on the cheap. Thanks, Cass!!!!!!!


Thursday, February 17, 2011

Little by Little

Big breath...here I am...taking a leap of faith and going for it. I have been reading so many amazing DIY blogs lately and am totally inspired. The women I have been reading about are totally talented. I, on the other hand, am not! But, I am going to try. Here's a little history about us...

We have a new house. Well, kind of new. We have been here for about 7 months now. When we moved in, everything was fine: the colors on the walls were fine, the kitchen backsplash, the bathroom faucets, the landscaping. All fine. I was totally content to do nothing here for a while. But, then, I got the bug.

When we owned our last house, we jumped right in with both feet. We totally transformed the half bath, painted the bedrooms, stained the kitchen cabinets, added new countertops, painted the kitchen and den. And that was all in the first 5 months! Well, add two years and a second child and we slowed right down with this house.

I am ready now! I am going to attempt to show the things that I am doing along the way. Limited money, limited ideas, limited know how, limited craftiness and limited creativity. Should be interesting, (insert ridiculous face here) and maybe a little entertaining! I hope you will laugh along with me as I fumble way through!